Partners' Guide: How to Create a New Customer Company

Introducing a new customer? With a few clicks in your Partner Admin Dashboard, you can have them onboarded in minutes. 🚀
Watch our Video Tutorial:
How to Create a Customer Company:
Step 1. Create the Company
- Sign in to your Partner Admin dashboard
- Go to the Company section > Click Actions > Create Company.
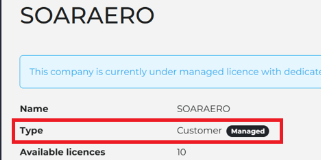
- Select Customer as the company type
- Fill in the following details:
- Company Name
- Size
- Industry
- Country
- Default Language ( optional)
*The language you select applies across phishing emails, training content, and system notifications -wherever translations are available.
Need for info? See our Localisation Guide.


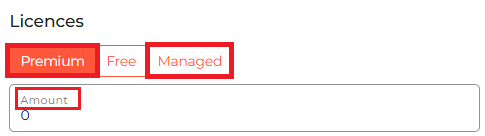
Step 2. Assign Licences
- Choose Licence Type: Premium or Managed.
- Premium: Self-managed Security Awareness Programme. You will be billed under Premium terms.
- Managed: The power of Premium but managed for you. You will be billed under Managed terms.
- Enter the number of licences required.
If you want to create a 30-day trial instead? Please take a look at our How to Create a 30-Day Free Trial guide.
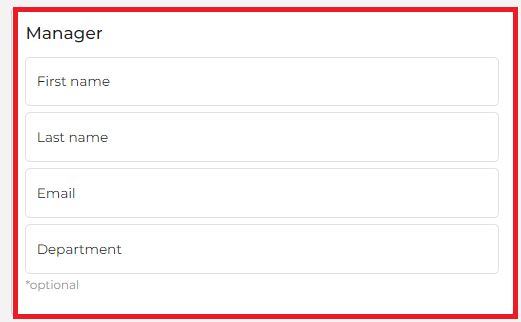
Step 3. Appoint an Admin Manager
If you're creating a Managed Customer Company,
- Appoint yourself ( Partner) as an External Manager.
- Access to the customer is restricted, as this is a managed for you programme.
If you’re creating a Premium Customer Company, you can:
- Appoint yourself as the External Manager, or
- Appoint an Internal Manager within the customer’s organisation.
If you appoint an Internal Manager upon company creation, you can later enter Manage Mode and appoint yourself as the External Partner Manager within your customer account. See our Partners' Guide: How to Add Internal and External Managers.
To appoint an Internal Manager:
- Select Internal Manager.
- Enter the manager’s name, last name and email address.
- Click Save.
*This manager will receive a Manager Welcome Email with setup instructions and a link to create their login credentials.
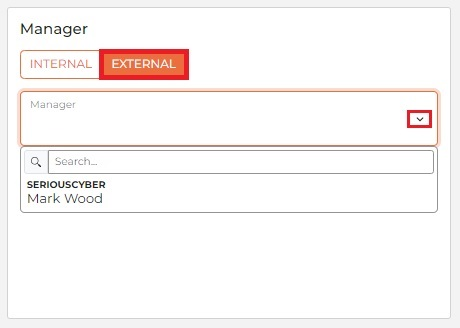
To appoint an External Manager:
- Select External Manager
- Choose a person from your organisation (Partner) to act as an Admin Manager within the customer account.
- Once completed, click Save.
Your new Customer Company will now appear under the Customer section in your Partner multi-tenant view.
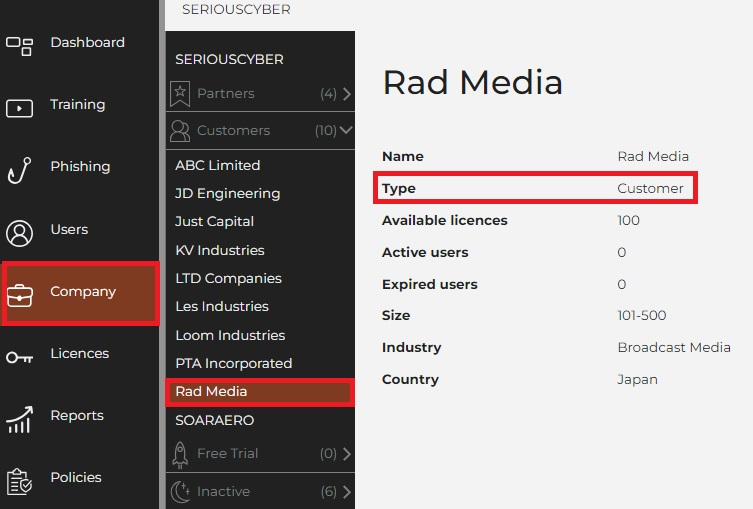
Managed Customers will display a "Managed" pill next to their company type.
System Emails - What Internal Managers Receive
|
Email Type |
Recipient | Purpose |
| Manager welcome email | Internal Manager | Guides them to set up their password. |
| Licence assigned notification | Internal Manager | Prompts Manager to allocate licences to learners. |
| Licence expiry | Internal Manager | Alerts when licences are about to expire |
| Premium Training License Requested | Internal Manager | Sent when new licences are ordered, prompts Partner follow-up |
| Phishing campaign results | Internal Manager | Results of a phishing campaign that recently ended. |
| Training campaign results | Internal Manager | Results of a training campaign that recently ended. |